
By Michael Munk
This is the last brick that we have to add to our base for mastering the technical aspect of photography.
The last part of the Exposure triangle left to learn about is ISO speed. This will give us a whole new dimension of control in low light situations.
In “the old days” ISO (International Standards Organization) made this standard for measuring the speed of film for photography. It simply means how fast a film responds to light. Before digital photography you had to change to another film. Luckily with the modern cameras we only have to push a button, and the sensor inside the camera becomes more or less sensitive to light.
A low number gives low sensitivity to light.
Picture it like putting on sunscreen before sunbathing.
- ISO 100 A sun blocker with a high factor – You can stay for hours without getting a sunburn.
- ISO 1000 Normal medium factor sun blocker – You will get a suntan faster.
- ISO 6400 Almost like putting on pure water – You will get sunburnt fast.
So when and why to use the ISO setting? When I have to choose which settings to use I always ask myself some basic questions. I will return to these later on in this article. First I want to give some basic guidelines for the ISO speed in priority- or manual-mode:
- ISO 100 On a sunny day you should keep the ISO low!
- ISO 400 On an overcast day or at dusk and dawn
- ISO 800+ Inside at night without flash
Remember to keep the ISO as low as the conditions allows it
So far so good. We have a setting to compensate for low light conditions. But what is the catch?
The higher ISO the lower quality of the image
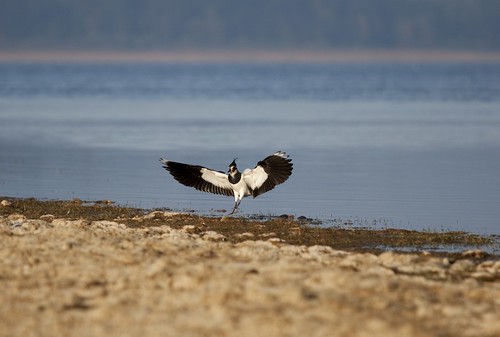
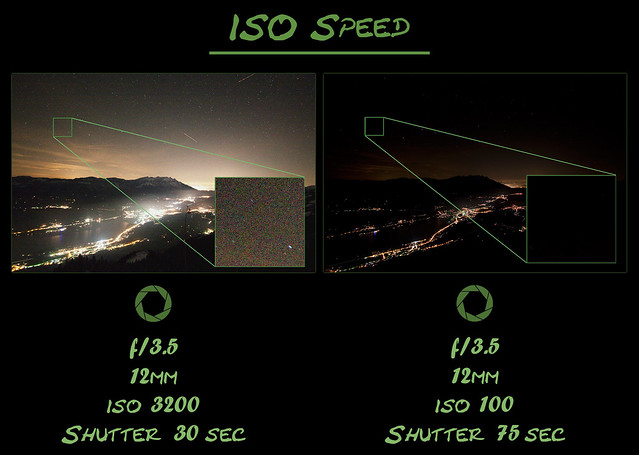
ISO 100 will give crisp and razor-sharp images (with little noise/grain). Like the image of the lapwing in the beginning of this blog. The more you bump the ISO the more noise you will get. Below I have made a comparison of two images, from the same location a few minutes apart, to illustrate the downside of choosing a high ISO speed in low light.
Now with this knowledge let us get back to a couple of questions to ask yourself before pushing the shutter.
- What do I want with this image?
- How do I achieve this?
- How is the lightning?
- What aperture and shutter speed will it require?
- What is the lowest ISO speed to make this possible?
And then some more concerning composition, but that is another article to be made in the future.
Here are situations where a higher ISO is useful:
- Indoor family get together some times a flash would just ruin the moment
- Indoor sport event fast moving objects in poor light
- Concert again low light
- Indoor architecture fx churches and galleries have rules against the use of flash
Another example is the next two images both taking during a full moon. Depending on the setting you will get different results.
A low ISO speed and a long shutter speed will give this glowing light effect
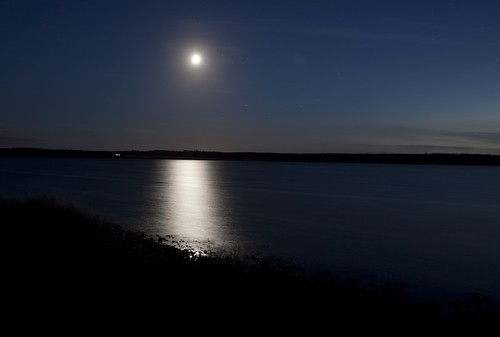
Exposure: 25 sec
Aperture: f/4
ISO 100
Focal length: 22mm
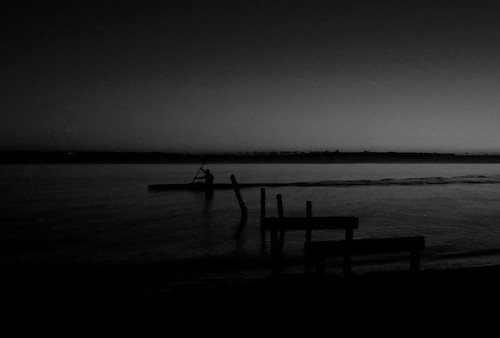
A high ISO and faster shutter speed will capture details and create another mood

Exposure: 1/80
Aperture: f/4
ISO 500
Focal length: 200mm
How to use high ISO in a creative way? If you have the right scenery, then a grainy and noisy images will result in a special mood and a raw appearance. Like this last image.
Of course there are really good tools in post production (PP) to reduce, or ad, noise from your pictures. I will not go further into this at this point. But still these various types of software will improve a lot of the unwanted noise. I will return to this later on.
Generally you want to keep the ISO as low as possible. But make sure to bump it up when needed. It is the only way to get the result you are after.
Enjoy!
Ingen kommentarer:
Send en kommentar