
By Michael Munk
When I took my first steps into the world of photography I remember that the most confusing about it all were the complete chaos concerning camera settings. New difficult technical terms, and some even more puzzling systems of numbers describing all sorts of things.
But with the knowledge I have got now I know how important a deeper understanding for all those technical details are.
It all comes down to one of the most important (if not THE most important) aspects of photography – understanding light. The perfect motive or the perfect scenery might be captured in a picture, but that wow-effect which amazes people only comes with interesting light.
It is all about understanding the light – how it behaves – how to control it – and how to capture it!
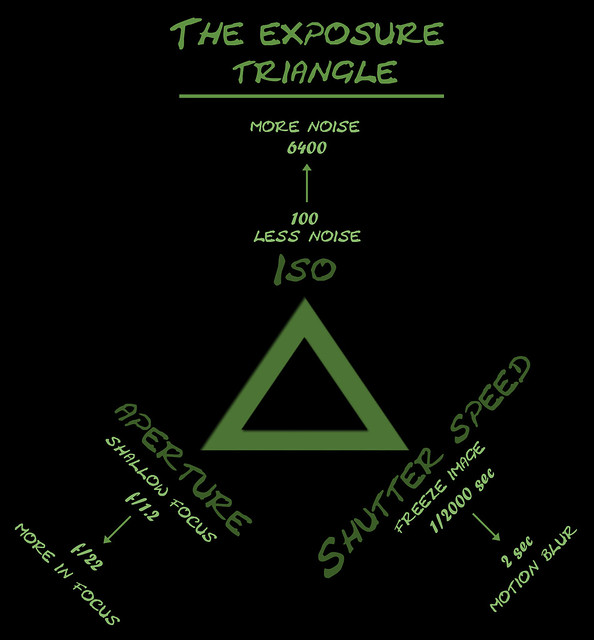
I will go deeper into this subject later on. But for now I want to go through the basic elements of taking a picture. Whether it´s done with a point-and-shoot- or a DSLR camera it involve three elements.
Three interconnected vertexes in a triangle. They all relate to light: How it enters the camera. How much that enters and they determinates if the exposure becomes the image we had in mind.
The three elements are:
© Copyright by MunkPhotography.com
It is in the middle of this triangle the exposure is made. BUT as they are connected we can’t change one without it affecting the two others. This is an essential fact to keep in mind before pressing the shutter release.
Different situations require specific setting of both ISO, Aperture and Shutter speed – keep all three in mind!
There are some (among photographers) common know metaphors to ease the understanding of these settings.
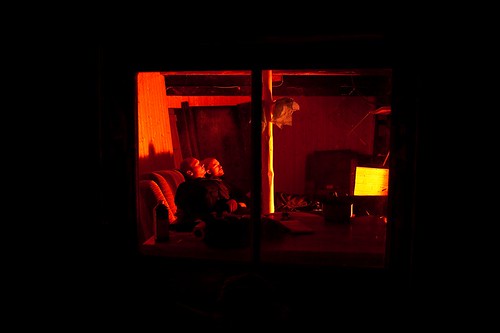
The window
This metaphor was helpful to me when I struggled with understanding especially Aperture and ISO speed.
© Copyright by MunkPhotography.com
Imagine this: Your camera is like a sealed house with only one large window (this window is the opening in your lens).
The size of this window can differ (Corresponds to how big an opening your lens can make - maximum aperture. A big opening allows a lot of light inside, but a bigger opening is more expensive).
For example take these two lenses:
EF 300mm f/4.0 L IS USM Price example: 1.289,00€
EF 300mm f/2.8 L IS USM) Price example:
These are very similar lenses but one has a bigger opening (f/2.8) and therefore capable of capturing more light thus more expensive.
Now back on track; we have our different maximum window sizes:
Maximum apertures:
f/1.2 Very big window
f/2.8 Pretty big window
f/4.0 Normal window
f/5.6 A bit smaller window
Now imagine a curtain which can be pulled and drawn back. If it’s almost shut only little light enters.
f/1.2 Curtains are drawn back – plenty of light (Max aperture - lens completely open)
f/8 Curtains are pulled a bit
f/16 Closed quite a bit – less light enters
f/32 Only a small crack for light to enter (Min aperture)
I used to think the biggest mind job about aperture was this fact:
A small number (f/"number") is the biggest opening in the lens.
Now when adjusting ISO you should imagine that you are standing in front of the window looking out. Now you have a choice of different sunglasses.
ISO 100 The darkest biggest glasses imaginable
ISO 400 Lighter but yet quite dark
ISO 800 Light brownish sunglasses
ISO 3200 Glasses with little sun blocking effect
The more you push the ISO to compensate for low light conditions the more noise/grain you will get in your image.
Always use the lowest ISO possible! ISO 100 on sunny days. Push it up a bit in low light conditions.
Shutter speed is simply the time from you open the shutters outside the window until you close them again. So it is the amount of time when light is allowed inside the sealed house.
This is not a “perfect” description of the technique inside a camera and there are other good metaphors. Nevertheless I hope you have got the overall idea of the mechanisms behind controlling light during an exposure. This article will be followed by a couple of more detailed articles of how and when to use different settings.
Always remember that it takes a long time and a lot of practice to feel confident about the camera settings! But I can only encourage you to try the Priority-modes and Manual-mode.
As I have said before
In digital photography you can take as many shots as you like without any cost – go explore your equipment and explore the light!
Ingen kommentarer:
Send en kommentar